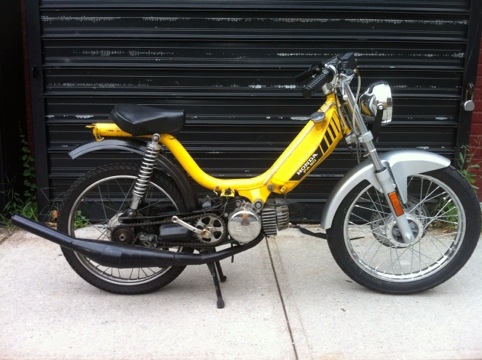
With the Green 103SP running great it’s on to writing about my other winter project, The Hobbit! I haven’t come up with a good name for it yet but I’ll come up with something. I’m sticking with the yellow and black look but Bumblebee seems so overdone these days…hmmm…moving on…
So I got this moped from my buddy Ben and he already had some nice parts on it; Parma Kit and Weekends Pipe. The moped looked stock otherwise but ran great just like a stock hobbit should. Of course I want something I can really blow up so I started cutting!
I’m not a fan of the stock seat, so off it came and I mounted up an old Peugeot seat nice and low. I had a Tomos Streetmate front-end that fit right on, the shocks from Old Blue and found some cheap clip-ons on eBay. I slapped it all together to see how the riding position felt and I like it!


Insert project delay (wedding, honeymoon, work insanity, etc…)
I then scored a ton of Hobbit booty!

I’m pretty sure I can build something from all of this!
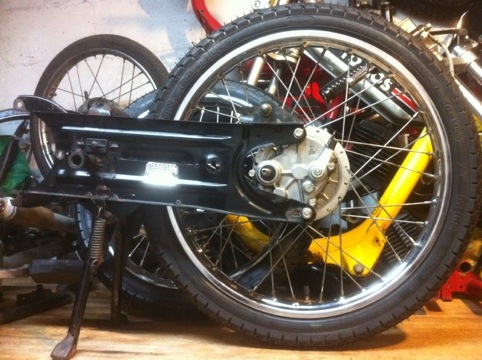
I wanted to rebuild the rear wheel as the stock rim was pretty rusty and now narrower than the Tomos front wheel. I found the width I wanted on Treats and disassembled 2 rear wheels to find the best (rust free) spokes I could. With a little polishing and some photos of the old wheels lacing I built this.

I don’t have a truing stand but 2 Allen keys and the hobbit subframe work pretty well!

All done and tire mounted.
Next up some engine clean up in the living room…only attempt this when your wife is out of town!

Bring on the engine tweaks:
1. Malossi 21 intake with Dellorto PHBG 21
2. Boyenson dual reeds
3. Removal of the starter clutch
4. Doppler springs
5. TJT with the lightest weights
6. Replaced all the stupid Phillips screw with Allen screws.
Everything goes together really easily. The hardest part was the clutch springs but the using snap ring pliers trick works great. I need to find the video that explains it but you’ll get the idea.

 Then put it all together.


Next up is making this guy a top tank and wiring up the HPI!